Today I’m going to show you how to make a suitcase dollhouse!
Using an old vintage suitcase, some Dollar Tree craft supplies, and random thrift store finds, here’s our DIY suitcase dollhouse.
Suitcase Dollhouse DIY
One of my favorite toys growing up were my dollhouses.
My sister and I had a few, and they were packed with homemade furniture and all sorts of dolls and My Little Ponies.
Our ponies were allowed in the house, of course.
Step 1: Get an Old Suitcase
So when I was looking at these old vintage suitcases I had originally bought at a junk shop to use as decor on some high plant shelves, I wondered how to repurpose them.
And then I thought… foldable, upcycled dollhouses!
Take ’em to Gramma and Grampa’s house for sleepovers, move them from room to room. Fold away when not in use. What could be more perfect?
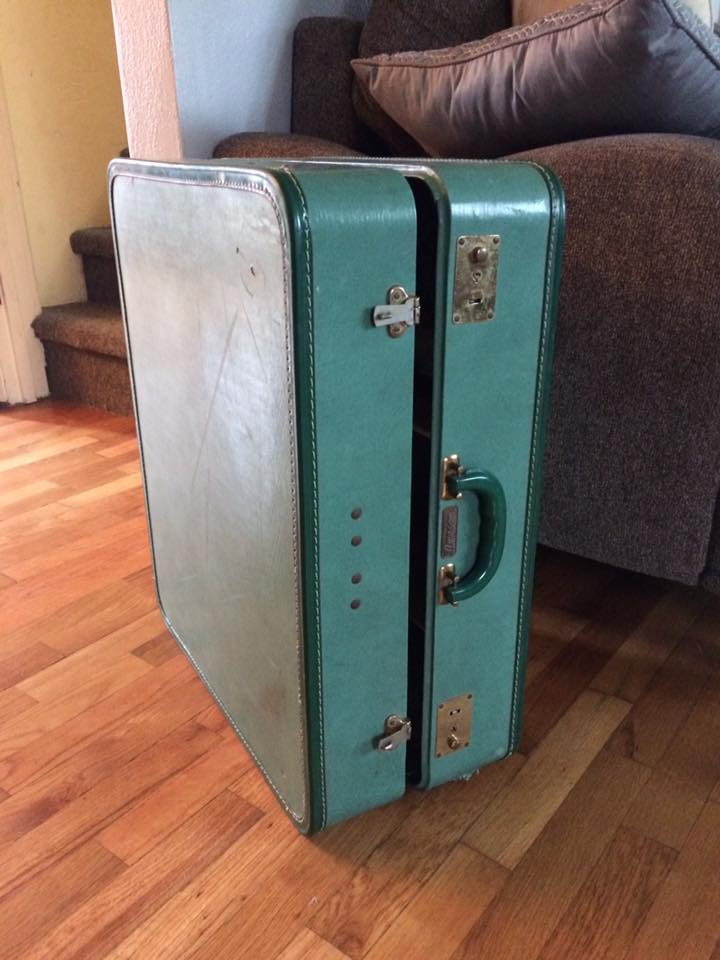
That’s one of them.
I don’t have a photo of the other one, but it was basically the same size in a rose/mauve pink shade.
Step 2: Clean
The first thing I did was clean them thoroughly.
Those things can get nasty… dirt buildup, stains, crumbs. Vacuum and scrub it out with some Lysol.
Step 3: Choose Your Theme
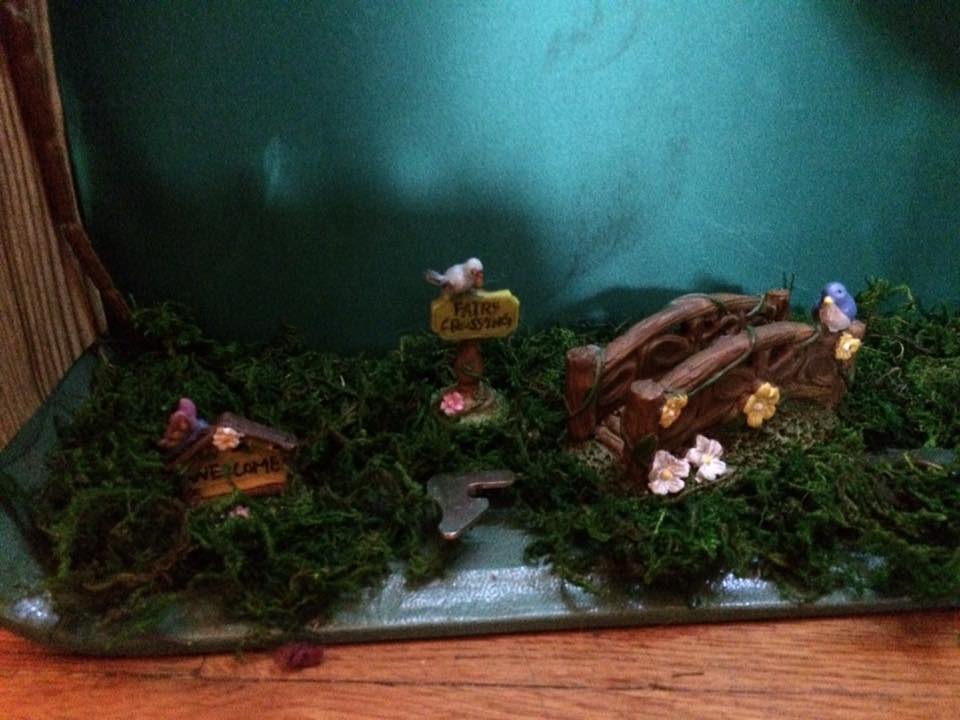
The green one had one side that was covered in green/blue silk. I decided to leave that as the “outside,” and make a fairy garden out of it.
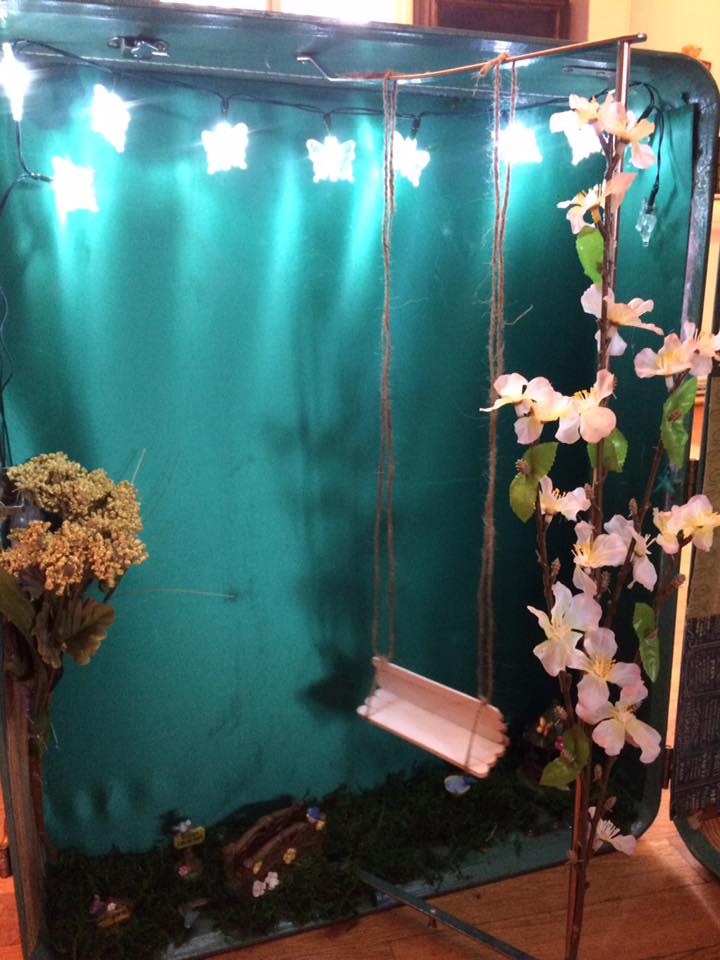
With moss, flowers, and decor from the Dollar Tree, I constructed a sweet porch swing out of Popsicle sticks, and hung a strand of butterfly shaped fairy lights.
The battery packet for the lights were hidden behind the flowers.
Depending on the color and look of your suitcase, the style that you’re into, and what crafting materials you have or find, you can go all sorts of different routes.
Magical fairyland, haunted Halloween, modern, vintage chic, antique, sporty, 1950’s, 1970’s, and so on. Find your groove and go with it!
Step 4: Create Rooms/Stories
I separated the right side of the suitcase into three stories by cutting a piece of plywood to form the floors/ceilings.
Cut to size, then nail, screw, or woodglue it together.
Hey there! Yes, you! Have you read my books yet? You should! Check out my works here.
Step 5: Wallpaper Interior
Then I wallpapered each room differently. Use scrapbook paper, which usually comes in large enough sheets, or print out patterns from the internet.
Paste in with glue or mod podge and you’re good to go!
Step 6: Furnish Interior
This is where you’ll have to use your creativity.
For my suitcase dollhouse, I used the mirror from half of a broken compact as a wall accent.
The furniture came from basically haunting the toy aisle at thrift shops, like Goodwill and St. Vincent de Paul’s.
Look in the knickknack section too, and try to reimagine and repurpose things!
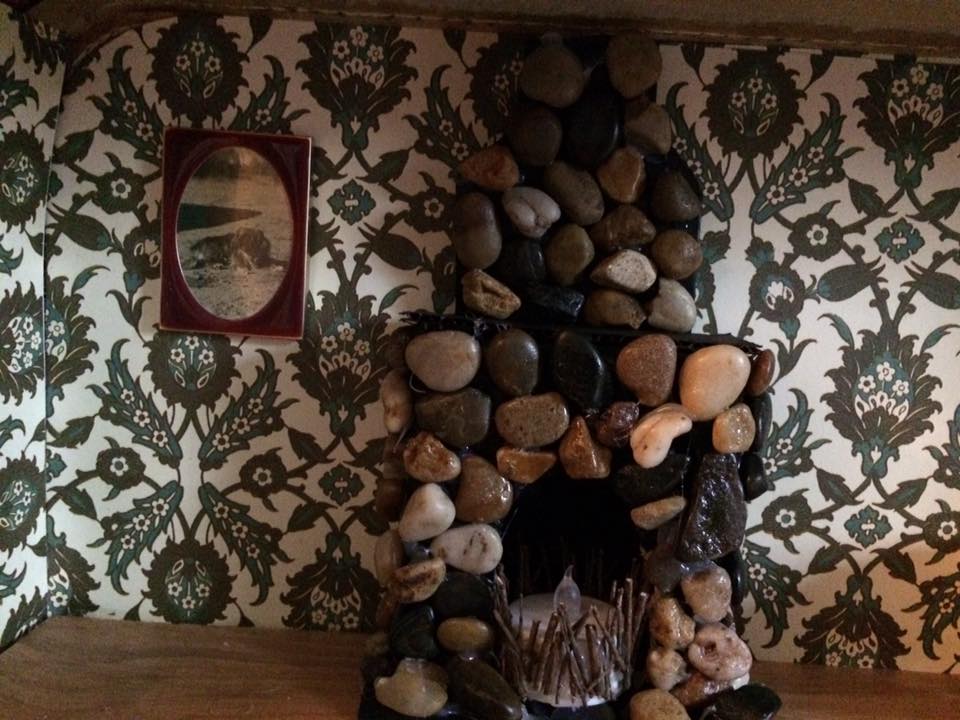
The wallpaper is scrapbook paper, and the fireplace was constructed out of a small empty box, covered in little pebble rocks from the Dollar Tree.
The battery operated “fire” (a teeny candle) also came from the Dollar Tree, and I simply glued small twigs around it.
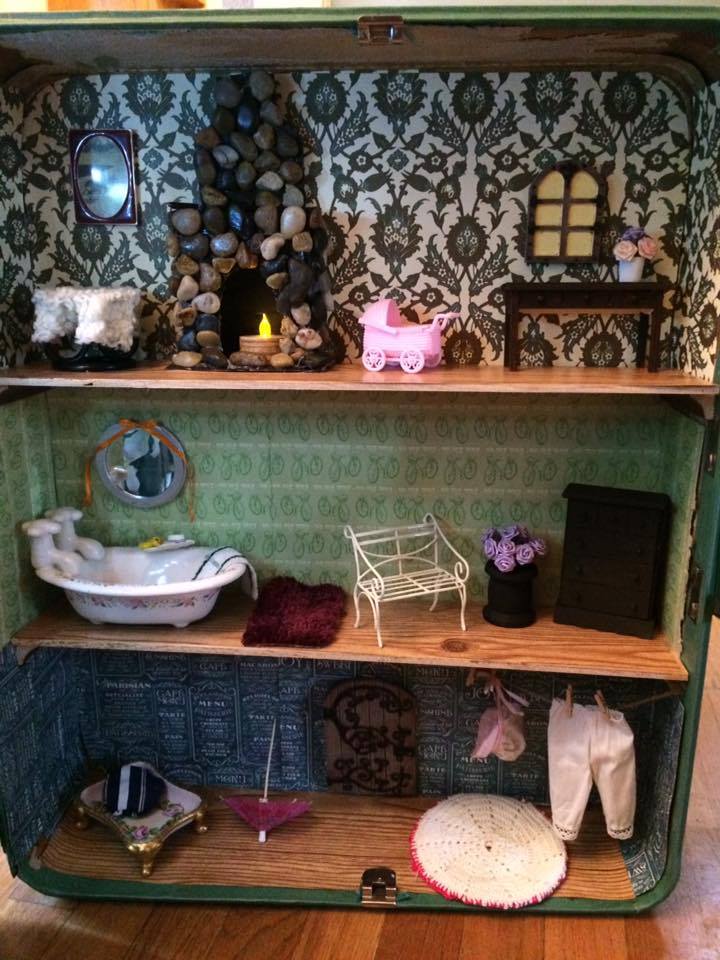
The little flowers can be found in the craft section of Walmart.
To make the vases, I simply used a toothpaste cap as one, and a wooden spool of thread (empty) as another!
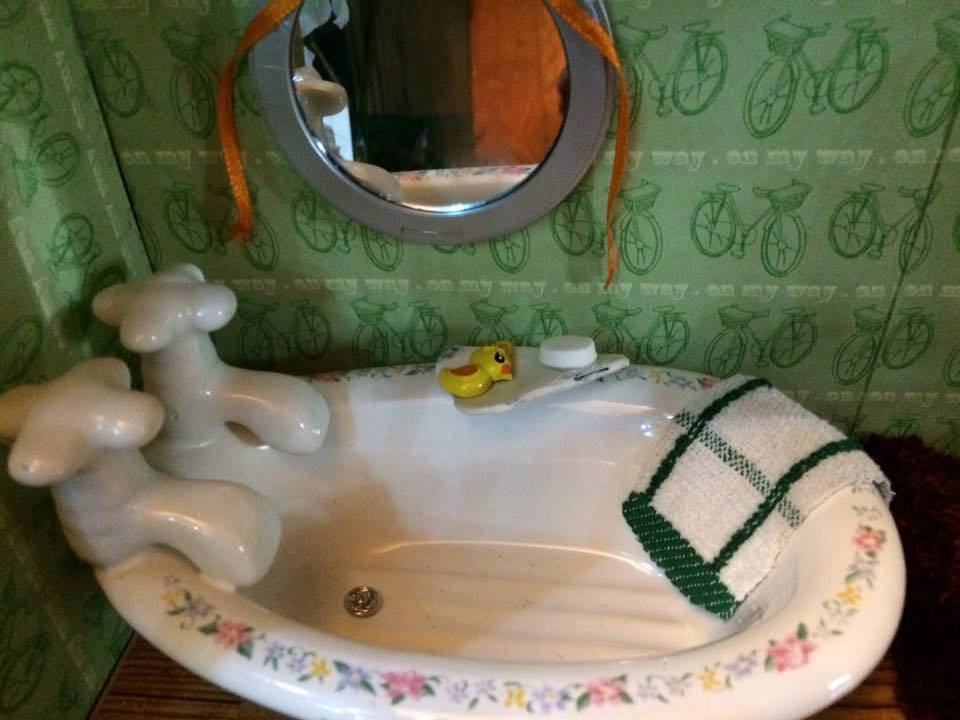
The tub was just a lucky find, but a soap dish works as well, or a butter dish.
See the “soap”? That there is an Altoid mint.
The rubber ducky is actually just one half of a pair of earrings.
I added a “drain” to the tub, which is a tiny snap, like you would use on baby clothes and the like.
The towel is simply a snippet cut from an old terrycloth towel I had.
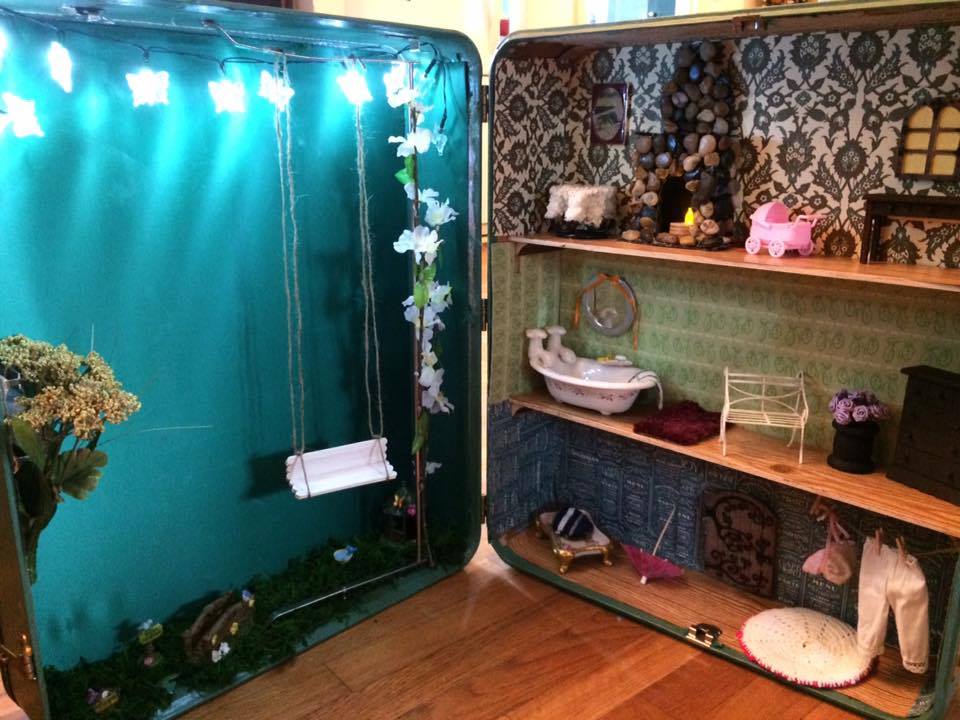
With one side the indoors and the other side the outdoors, this is the perfect play/display area for your mini dolls and decor.
It turned out so cute!
More Suitcase Dollhouse DIY Examples!
Now onto the mauve one!
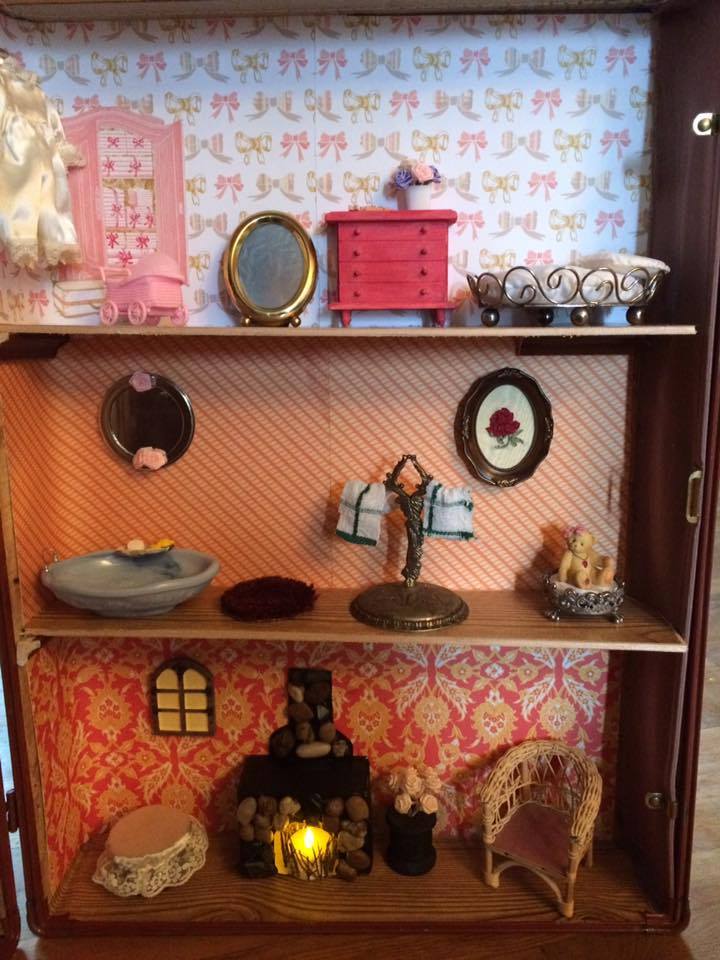
This suitcase dollhouse was more little girly, but I used a lot of the same ideas.
I made three shelves to form three stories, and decorated each “room” in the dollhouse a little differently.
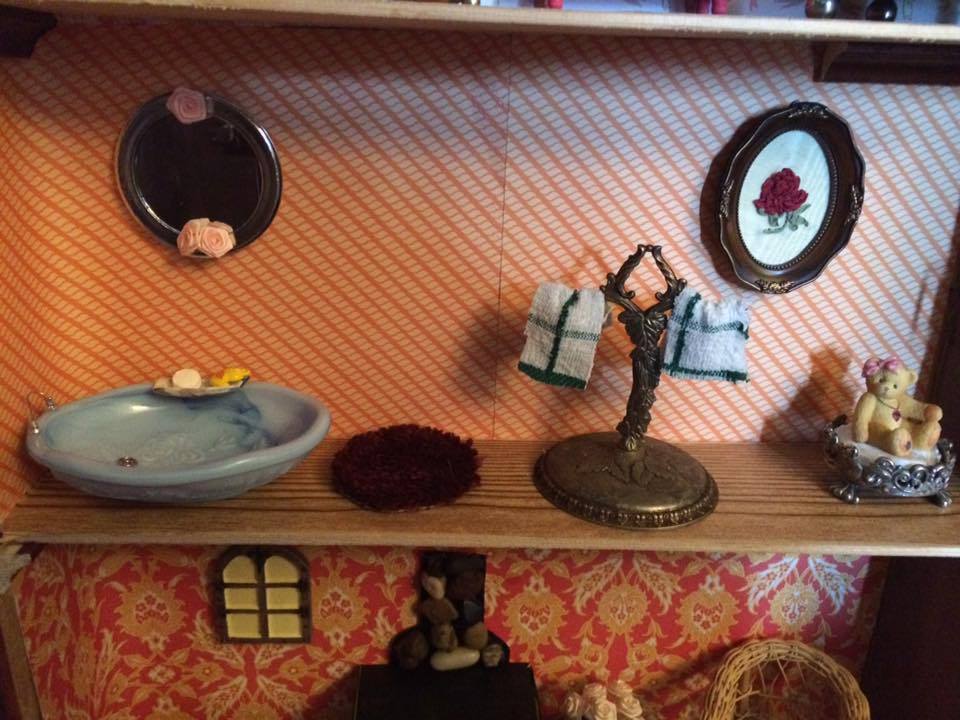
Above, the rug is cut from an actual full size rug I was going to throw out anyway.
The towel holder is an earring holder (I think??) I got at Goodwill.
As for the bathtub, it’s a soap dish with a dangly earring “loop” as the faucet.
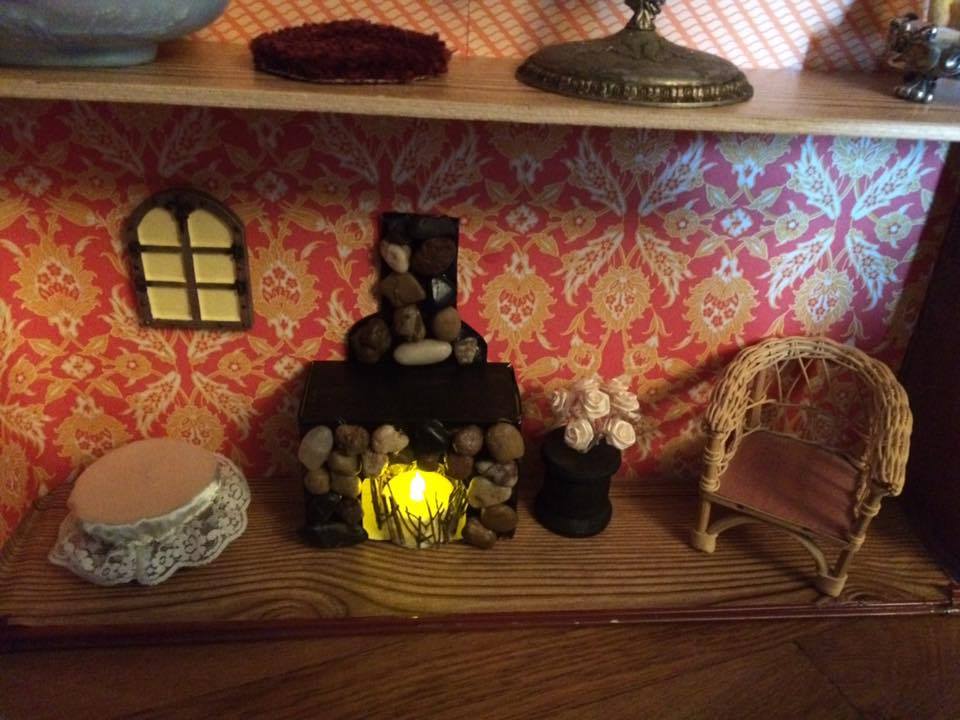
It’s been a while since I sold this one, but if I remember correctly, the other half was lined with satin pockets.
They made great storage for the furniture and dolls, if you only wanted to decorate half like I did!
Suitcase Dollhouse: A Fun & Easy Project!
There you go. It was such a fun and easy project, and it cost hardly any money at all.
The fun part is customizing your dollhouse! Want a ballet room? An art studio? A fancy dressing room? The sky’s the limit!
For more inspiration, to ask questions, or to commission me to build a dollhouse like these ones for you, feel free to drop me a comment!
And if these are far too delicate and sweet for your taste, get ready to see my haunted suitcase dollhouse here!
Pin It




Tamara says:
Hi
How do you make the Floorboards in the green suitcase
February 9, 2023 — 10:52 pm
Melyssa Williams says:
Hi there! So sorry it took me so long to see this comment. I used a roll of sticky paper (like what you would use to line your kitchen drawers, I forget what it’s called). Just cut to size, peel, and stick!
September 14, 2023 — 10:19 pm
Michelle says:
Hi these are so cool. Im gonna make one for my grandaughter. How deep/tall, should the inner part be….is 6.5 inches be fine?
November 30, 2023 — 3:06 pm
melyssa m williams says:
Should be fine! Find the suitcase first and go from there! Have fun!
December 2, 2023 — 6:37 pm